Floating Shelf Weight Capacity Calculator
The Rule of Thumb in Action
Based on the article: Maximum 10-inch depth for drywall, 30-40 lbs per stud, and 2+ studs for shelves over 24 inches.
How many times have you hung a floating shelf only to have it sag, crack the wall, or drop your favorite vase? You followed the instructions, used the right screws, and still - it didn’t hold up. That’s because most people don’t know the real rule of thumb for floating shelves. It’s not about the screws. It’s not even about the bracket. It’s about three simple, non-negotiable numbers: depth, spacing, and weight.
Depth Matters More Than You Think
Most floating shelves you buy are 8 to 12 inches deep. That looks nice on Instagram. But here’s the truth: the deeper the shelf, the more leverage your items create. A 12-inch shelf holding a stack of hardcover books? That’s like hanging a 15-pound weight at the very edge. The wall has to fight that torque - and most drywall can’t handle it.
The rule? Never go deeper than 10 inches unless you’re mounting into solid wood studs across the entire length. For standard walls with drywall and no backing, stick to 8-inch shelves. They’re sturdy, look clean, and won’t pull away from the wall over time. If you need more space, install two 8-inch shelves side by side instead of one long, deep one.
Real-world example: A 10-inch shelf in a bathroom holding towels and toiletries? Fine. A 12-inch shelf in a living room holding a heavy ceramic lamp, three books, and a plant? That’s asking for trouble. The weight isn’t the problem - the distance from the wall is.
Spacing Between Shelves: 12 to 18 Inches Is the Sweet Spot
People stack floating shelves too close together. They think it looks ‘modern’ or ‘minimalist.’ But if shelves are less than 12 inches apart, you can’t place anything tall on them without blocking the one above. And if they’re too far apart - say, 24 inches - you lose visual rhythm and the wall looks empty.
The working rule: Keep shelves 12 to 18 inches apart. That’s enough room for a stack of books, a small plant, or a framed photo without crowding. If you’re hanging shelves in a kitchen above a counter, 14 inches is ideal - it gives space for mugs or spice jars without hitting the ceiling.
And don’t forget: the bottom shelf should be at least 18 inches above any surface below it - a countertop, a sofa arm, or a windowsill. That’s the minimum to avoid bumping your head or knocking things off when you walk by.
Weight Capacity: It’s Not About the Shelf - It’s About the Wall
You see shelves advertised as ‘holds up to 50 pounds.’ That’s marketing. Real weight capacity depends on three things: how many studs you hit, how many screws you use, and what kind of wall you’re drilling into.
Here’s the real rule of thumb: Every stud you anchor into adds 30 to 40 pounds of safe holding power. If your shelf spans 36 inches and you hit two studs, you’re looking at 60 to 80 pounds total capacity - if you use the right hardware.
But if you’re only using drywall anchors? Don’t put more than 10 pounds on it. Even the best toggle bolts can’t hold heavy items long-term. Drywall is brittle. Over time, the weight pulls the anchor out. That’s why your shelf slowly tilts forward - it’s not broken, it’s failing slowly.
Pro tip: Use 3-inch wood screws into studs. Not 1.5-inch. Not drywall anchors. Three inches. That’s what professionals use. The screw needs to go at least 1 inch into the stud itself. If you’re using a stud finder and it says you’re over a stud, drill a test hole. If you hit wood, you’re good. If you hit air, move over.
Installation Mistakes That Break Shelves (And How to Avoid Them)
Most floating shelves fail because of three installation errors:
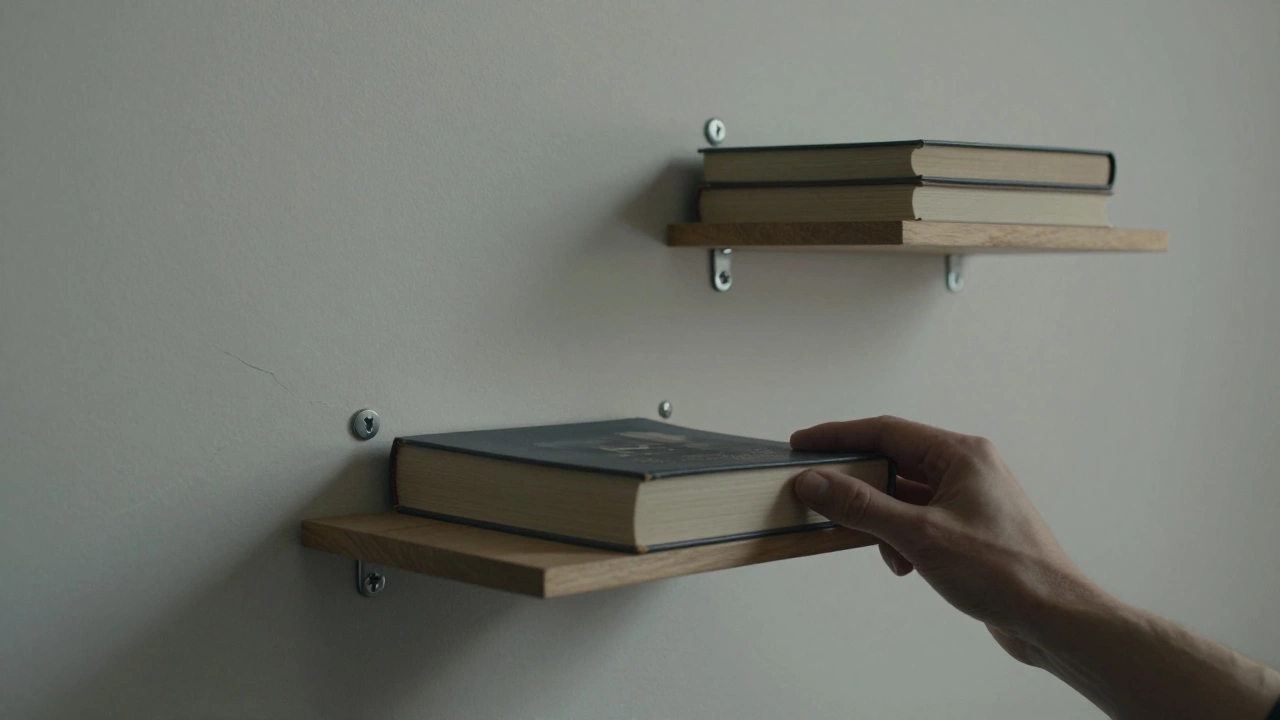
- Mounting on drywall alone - No studs, no chance. Even with heavy-duty anchors, the shelf will sag within months.
- Using too few screws - A 36-inch shelf needs at least two screws per stud. One screw per stud? That’s asking for a slow collapse.
- Not leveling before drilling - A shelf that’s even slightly crooked will pull unevenly. That stress cracks drywall and loosens screws over time.
Here’s how to fix it:
- Use a stud finder that detects wood, not just metal. Cheaper ones often miss studs behind tile or thick plaster.
- Mark your stud locations with a pencil. Then double-check with a small drill bit - you’ll feel the difference when you hit wood.
- Use a level. Not your phone’s app. A real 24-inch bubble level. Place it on the shelf bracket before you screw it in.
- Drill pilot holes. Even in wood. This prevents the stud from splitting and gives the screw a clean path.
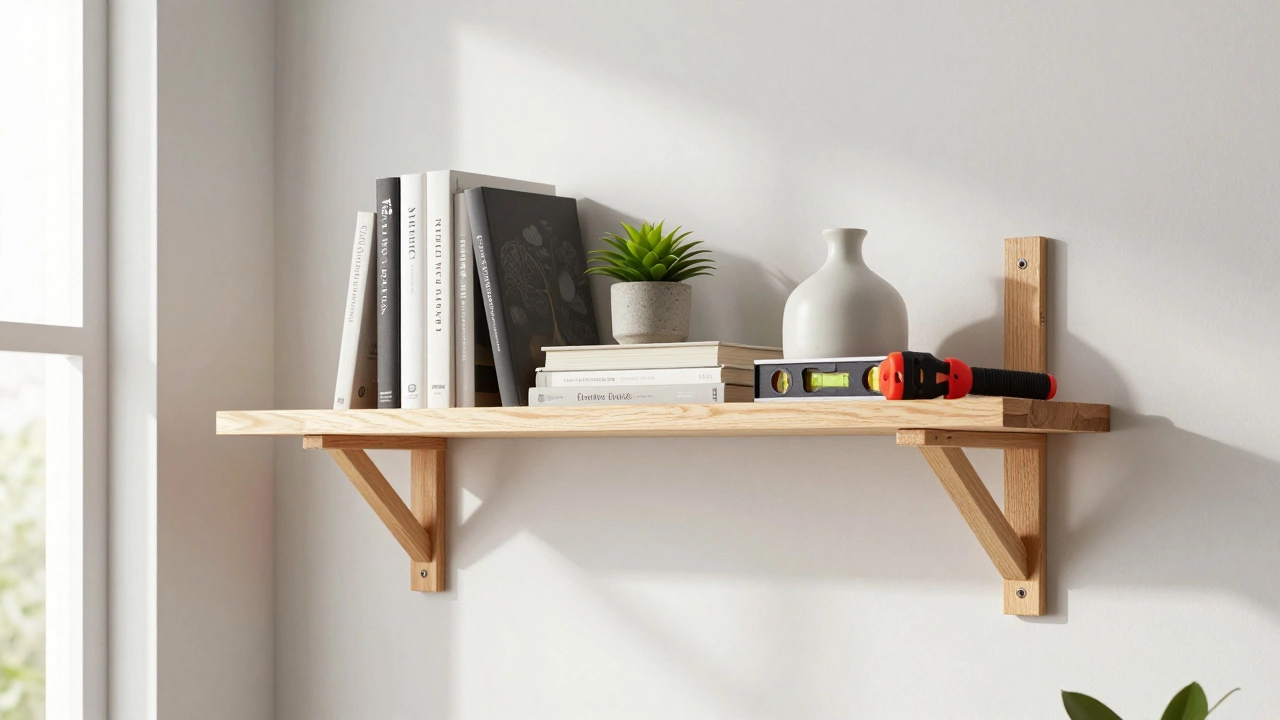
What to Put on Floating Shelves (And What to Avoid)
Not everything belongs on a floating shelf. Here’s what works:
- Books (up to 10 per shelf if they’re standard size)
- Small plants in lightweight pots (under 5 pounds)
- Decorative bowls, vases, or framed photos (under 3 pounds each)
- Lightweight storage bins (for linen or office supplies)
Here’s what doesn’t:
- Heavy appliances - coffee makers, toasters, blenders
- Large or thick books (like art books or encyclopedias) - they’re too heavy for 8-inch shelves
- Water-filled items - fish tanks, large planters with wet soil
- Anything you’d be upset to lose - heirlooms, expensive glassware, or fragile collectibles
Think of floating shelves as display pieces, not storage units. They’re for looks, not heavy lifting. If you need to store things, use cabinets. Floating shelves are the jewelry of your walls - not the toolbox.
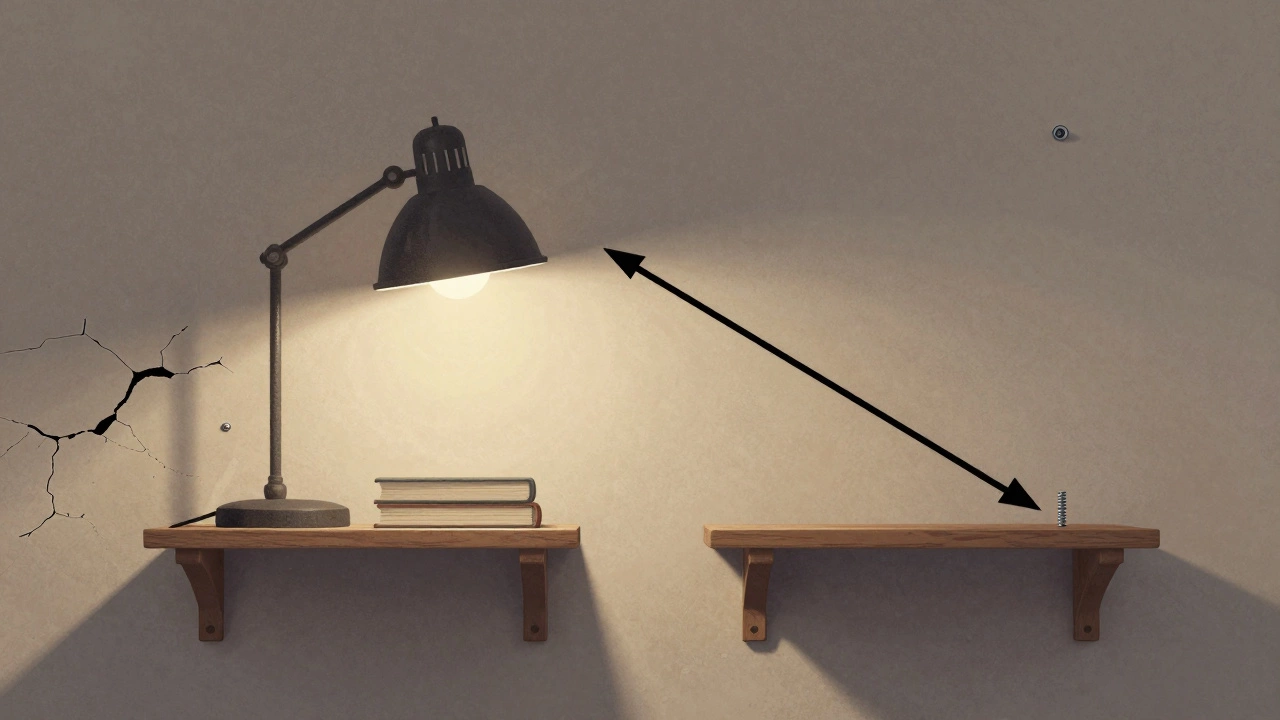
Real-Life Test: What Happens When You Ignore the Rules?
A friend in Oxford installed a 12-inch shelf above her sofa using drywall anchors. She put a large ceramic vase, two books, and a lamp on it. Six months later, the shelf tilted 15 degrees. The drywall cracked around the anchors. She didn’t notice until the vase fell and shattered.
She replaced it with an 8-inch shelf mounted into two studs. Used three screws per stud. Put the same lamp and one book on it. Two years later, it’s still perfect. No sag. No crack. No panic.
That’s the difference between guessing and following the rule of thumb.
Final Rule of Thumb: The 3-2-1 Formula
Here’s your cheat sheet - the only numbers you need to remember:
- 3 - Use at least 3 screws per stud (2 if the shelf is under 24 inches)
- 2 - Anchor into at least 2 studs for any shelf longer than 24 inches
- 1 - Never exceed 1 inch of shelf depth beyond the wall for every 10 pounds of load
So if you’re putting 20 pounds on a shelf, don’t let it stick out more than 2 inches beyond the wall. That’s physics, not opinion.
Follow this, and your shelves won’t just look good - they’ll last. No wobbling. No falling. No regrets.
Can I install floating shelves on plaster walls?
Yes, but you need to find the lath behind the plaster - it’s usually wood strips. Use a stud finder that detects wood, and drill pilot holes before screwing in. Plaster is brittle, so go slow. If you’re unsure, hire a professional. A mistake here can crack the whole wall.
Do floating shelves need a backboard for extra support?
Most commercial floating shelves have a hidden metal bracket that attaches to the wall. That’s the support. A backboard (like a thin piece of wood behind the shelf) isn’t necessary unless you’re building your own from scratch. If you’re hanging a heavy shelf, a backboard adds stability - but it’s not a replacement for mounting into studs.
How do I know if my shelf is overloaded?
Look for three signs: a slight curve in the shelf, small cracks around the mounting points, or a soft creak when you touch it. If you see any of these, remove half the weight immediately. Drywall damage from overload is permanent - you can’t just screw it tighter later.
Can I use adhesive strips instead of screws?
No. Adhesive strips like Command™ strips are designed for lightweight items under 1 pound - think pictures or small mirrors. They’ll fail under the weight and leverage of a shelf. Don’t risk it. Even the strongest adhesive can’t handle torque.
What’s the best tool for finding studs?
Use a stud finder with both magnetic and electronic detection. Magnetic sensors find nails or screws in studs, while electronic ones sense density changes. The best models, like the Zircon StudSensor or Franklin Sensors ProSensor, work through drywall, plaster, and even tile. Avoid cheap ones - they often give false readings.
Next Steps: What to Do After Installing
Once your shelves are up:
- Wait 24 hours before loading them - let the screws settle and the wall adjust.
- Check them monthly for the first three months. Look for new gaps, creaks, or tilts.
- Rotate heavy items every few months. Don’t leave the same book or vase in the same spot - that creates wear patterns.
- If you move, take the shelves down carefully. Reusing them? Fill the holes with spackle and sand smooth. You’ll thank yourself later.
Floating shelves are one of the easiest ways to add style to a room - but only if they stay put. The rule of thumb isn’t complicated. Depth. Spacing. Weight. Studs. Get those right, and your shelves will look beautiful for years.